How To Change Your Brake Fluid

Oct 28, 2016

How To Change Your Brake Fluid

  • Get the right brake fluid, check the cap on the master cylinder
  • Remove all wheels
  • Open the master cylinder and use a turkey baster to suck out the brake fluid
  • Top up with new brake fluid
  • Then go to each brake, remove the rubber cap at the back
  • Use a bottle with some tubing and attach it where you just remove the rubber cap
  • Pump the brake pedals until the liquid in the tube runs clear
  • Put the rubber cap back on and then top up with brake fluid again
  • Repeat on all brakes to change the brake fluid.

For more detailed step by step and best practice on changing your brake fluid, see below.

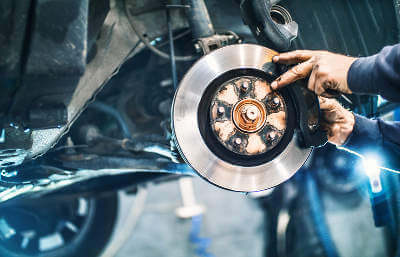
You may know that the braking system in your car uses a specialised type of fluid which needs to be able to operate at the high temperatures which are created inside your car’s engine.

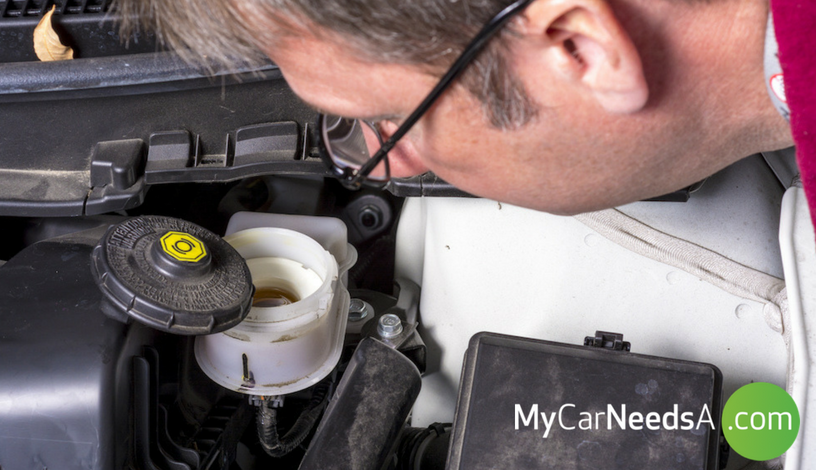
But it’s very unlikely that you’ve ever had cause to venture near the brake fluid reservoir - or there’s a fair chance that you might not even know where it is.

Fear not - MyCarNeedsA.com is here to reassure you that checking and changing your brake fluid is a pretty straightforward job, which can be done as part of your regular maintenance jobs on your car.

Get Quotes

What Is Brake Fluid And What Does It Do?

Brake fluid is a special composite liquid which produces the power which moves the various parts of your vehicle’s brake system. Specially formulated to work at high temperatures and under high pressure, it’s a substance which can’t be compressed.

When you press your brake pedal, this sends it through the pipes which are linked to the brake cylinders on each corner of your vehicle. This, in turn, applies pressure to the inner rims of your wheels, which then slows or stops the vehicle.

In simplified terms, this is how the brake fluid works in your braking system:

  • You press the brake pedal
  • The pedal presses down a piston inside the brake caliper
  • The compression causes pressure to build up within the brake lines and sets the brake fluid in motion
  • The brake fluid then creates pressure which acts on the brake rotors, causing them to push down on the brake pads, bringing them into contact with the wheels, slowing them down and eventually stopping them completely.

Believe it or not, there are several types of brake fluid on the market, and the right one for you car/vehicle’s system depends on the type of system it is. For example, anti-lock brake systems use glycol-based brake fluid, while non-ABS ones work with silicon-based liquids.

How, And How Often, Do I Change My Car’s Brake Fluid?

Because it is regularly called upon to work at high temperatures, your brake fluid will lose its effectiveness over time. Most car-makers suggest it is done as part of a major service, which is usually carried out every two years. For example, Volkswagen recommends this, but also says that the first brake fluid change is not needed until the car is three years old.

Franchised main dealers usually drain and flush brake fluid using a special machine. But you can do this job yourself, if you have a few bits of specialist equipment and an hour or so on your hands.

Firstly though, remember that brake fluid can be corrosive, so you should take care not to get it on your skin. It’s also a good idea to wear a pair of disposable gloves while you’re doing the job.

You can top up your brake fluid without draining your system, and you can buy the stuff from lots of shops which sell car parts.

But brake fluid deteriorates rapidly once it comes into contact with the air, because water vapour can cause rust in the system, but it also lowers your brake fluid’s boiling point. In cold weather, this can lead to ice crystals forming in it, which will eventually turn to water, and will reduce the effectiveness of your brakes. If your car is fitted with ABS, contaminated fluid can damage and even destroy important working parts of such systems.

To carry out a brake fluid change, follow this sequence:

  • Remove the old, dirty fluid from the master cylinder reservoir. You can do this using a turkey baster, which you can buy for as little as £1 from a hardware store or supermarket.
  • If you can get access to it, wipe out the reservoir with a lint-free cloth as you slowly empty it.
  • The system should then be flushed, but this is a job for two people, as you’ll need someone to loosen the bolts securing the bleeder valves. As these usually go many months without being loosened, they have a habit of becoming jammed. So they need to be gently manipulated - with the help of a few squirts of lubricating oil to ease them loose if necessary. If you can apply this a couple of days beforehand to give it the chance to penetrate into every little crevice, so much the better. Surface rust may also have accumulated on them, so a few gentle taps with a hammer may be called for to disperse this. Loosen the bolts, but leave them attached and closed.
  • Take a piece of clear plastic tubing (for example the type commonly used in an aquarium, which has the extra benefit of being pretty cheap). Push one end of the tube over the brake bleeder bolt at the right rear of the car. Place the other end of the tube in a small, clear bottle with an inch or two of clean brake fluid in it - this will prevent air being sucked back into the brake cylinder or caliper.
  • Put a small (about 10cm x 2.5cm should do it) piece of wood or similar material under the pedal to prevent the pedal from traveling too far when line pressure is released.
  • Top up the master cylinder reservoir with fresh fluid, up to the fill line which should be marked on the outside of the pipe, and put the cover back on the reservoir, then immediately replace the cap to prevent fluid from squirting out when you next press the brake pedal. Fluid will squirt out of an open reservoir every time the pedal is released.
  • As you refill the reservoir, you should take care not to let it get more than half empty.
  • Enlist a helper to get into the car and press the brake pedal on your cue. When you say so, they should press the pedal with the same amount of force as if they were trying to stop the car from rolling forward. Next, the helper, while keeping their foot on the pedal with the same amount of pressure, gives a cue. You have to then warn them that the pedal is about to sink further down, but they should keep their foot on the pedal, again keeping the pressure constant, while you tighten the bleeder bolt a quarter of a turn. This will release a trickle of old, contaminated fluid, and, as this stops and is replaced by clean fluid, you should close the bleed bolt.
  • This operation should now be repeated for each of the other three wheels.

One final tip throughout these operations - keep any fluid away from paint-covered surfaces, as it could strip away some of the outer layers.

Because it can be a fiddly job, and one which is best done with the help of at least some specialist tools, a brake fluid change on any vehicle is a job which suitably qualified mechanics and garage workers are best equipped to carry out.

You should have it done as part of a major service - but if you experience any problems with your braking system, even when no service is due, such as a spongy feeling in your brakes, it’s always wise to let an expert take a look.

Don’t let small, niggling brake problems grow into something much bigger, more serious, and very likely more expensive to put right - visit the repair pages of MyCarNeedsA.Com, and enter details of your problem. Members of our panel of garages will contact you with a quote for doing all the work needed, and you can then arrange a time to get the work done which suits you.

Share this post

Brakes

Brakes

Need pads, discs or shoes? Get quotes today?

Get Quotes